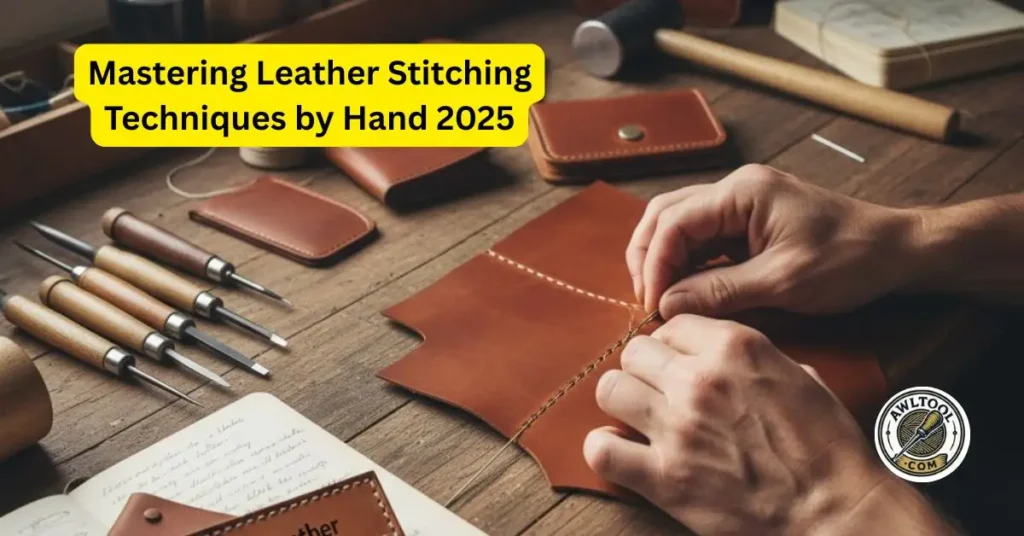
For beginners in the USA starting leather stitching, begin with the running stitch, it’s straightforward like sewing fabric but adapted for tough hides.
Move to the saddle stitch for stronger seams that hold up to daily wear, like on a phone case or bag.
Key steps: Mark your line with a ruler and groover, punch holes using an awl or chisel (avoid common tears by practicing on scraps), thread waxed cord onto needles, stitch by alternating passes, backstitch to lock, and seal ends with a lighter.
Quick 1-2-3 guide:
- Prep: Mark and punch even holes 1/8 inch from the edge.
- Stitch: Use two needles for saddle method, pulling tight for uniformity.
- Finish: Backstitch 2-3 times, trim, and melt threads.
As I often recommend in my reviews on AwlTool.com, like the 5 Best Awl Tool Kits for Beginners, starting with quality tools prevents frustration.
Table of Contents
What You Need Before Starting Leather Stitching
Many USA hobbyists I talk to at craft fairs or online struggle with gathering supplies, shipping delays from Amazon or overpriced kits at big-box stores like Walmart.
Based on my 20 years of testing, here’s what you truly need for success, focusing on budget-friendly options available nationwide.
Basic Tools Checklist for American Crafters
- Awl: A sharp piercing tool for holes; go for durable ones to avoid bending on thick cowhide. For picks, check my Types of Awls & Their Uses.
- Stitching chisels: Diamond-tipped for consistent spacing; essential for straight lines on projects like belts.
- Pricking iron: Lightly marks leather without full punches, great for beginners avoiding mistakes.
- Waxed thread: Polyester or linen, 0.8mm thick for most USA-sourced leathers; wax prevents fraying during long sessions.
- Needles: Blunt john james needles (size 004) for safety, blunt tips reduce pricks, a common issue for newbies.
- Edge groover: Creates channels so stitches sit flush, preventing snags on everyday items like wallets.
- Stitching pony or clamp: Holds pieces steady; DIY with wood scraps if you’re on a budget, as many in rural USA areas do.
Pro tip: Start with a kit under $50 from Tandy Leather (stores in most states) to sidestep compatibility problems. If you’re into curved edges for pouches, explore my Best Curved Awl Tools Reviews.
How to Prepare Leather for Hand Stitching Without Common USA Pitfalls
USA leathers vary, vegetable-tanned from Midwest suppliers is stiff, while chrome-tanned imports can be oily.
Mark stitch lines first: Use a metal ruler and groover for a 1/8-inch groove from the edge, ensuring stitches don’t pull out during use, like on a dog leash for your pet.
Punch holes: On a self-healing mat (available at Joann Fabrics), tap chisels with a rawhide mallet—keep perpendicular to prevent uneven tears, a frequent complaint in online forums. Space 5-7 stitches per inch for medium leather; too close, and it weakens like over-perforated paper.
Choose thread: Match thickness to leather (thinner for fine wallets, thicker for boots); always wax for glide, reducing hand fatigue during extended crafting sessions at home.
Avoid mistakes: Dull tools cause slips, sharpen as per my How to Sharpen an Awl. For safety, wear gloves; see my Awl Tool Uses Guidelines & 7 Safety Tips to prevent injuries that sideline many beginners.
Top Leather Stitching Techniques for Beginners (USA)
With rising interest in sustainable crafts amid economic pressures, USA makers often start with simple repairs before tackling gifts. These techniques address real problems like weak seams on store-bought items or customizing gear for outdoor activities.
Overview of Basic Leather Stitching Techniques
- Running stitch: Easy entry point, thread in and out like basic sewing; ideal for thin patches on jackets.
- Saddle stitch: Gold standard for strength; two needles cross for locked seams.
- Lock stitch: Knots inside for clean looks on visible areas like key fobs.
- Overcast stitch: Edges raw hides to stop fraying on belts worn daily.
Leather Stitching Techniques by Hand: Why It’s Better for Everyday USA Projects
Hand stitching beats machines for thick USA leathers, offering control to fix issues like skipped stitches. Tools: Awl for holes, needles for passing, fundamentals include clamping work and pulling evenly.
From my experience, it’s therapeutic for stressed Americans; start with scraps to build muscle memory, solving the “my stitches look crooked” problem many face.
Check more: Leather Stitching Techniques by Hand
Edge Leather Stitching Techniques for Belts, Wallets, and Sheaths
Groove edges first for pro finishes. Space holes evenly for belts (saddle for durability against belt loops). Use single needle for quick wallet edges, double for sheaths holding tools—prevents splitting under weight, a common fail for hunters in the Rockies.
Check more: Edge Leather Stitching Techniques
Lacing Edge Leather Stitching Techniques for Bags and Cases
- Whip stitch: Simple wrap for bag edges, flexible for daily carry.
- Double-loop lacing: Secure borders on wallets, resisting pocket wear.
- Mexican round braid: Decorative for phone cases, adding grip for slippery USA winters.
Check more: Lacing Edge Leather Stitching Techniques
Decorative Leather Stitching Techniques That Add Flair Without Weakening
- Cross-stitch: X-pattern for pouch accents, eye-catching for gifts.
- Zig-zag: Textured seams on journals, fun for bookbinding hobbyists.
- Baseball stitch: V-shape for curved gloves, strong for sports gear.
- Color-contrast: Bright threads for personalization, decorative won’t weaken if used sparingly on low-stress spots.
Check more: Decorative Leather Stitching Techniques
Comparing Different Leather Stitching Techniques
| Technique | Difficulty (1-5) | Key Tools | Strength Level | Best USA Projects & Why |
|---|---|---|---|---|
| Running Stitch | 1 | Needle, thread | Medium | Jacket patches, quick fixes for tears from workwear. |
| Saddle Stitch | 3 | Awl, two needles, chisel | High | Wallets, holds cards securely in pockets. |
| Whip Stitch | 2 | Needle, lace | Medium | Bags, flexible for groceries or travel. |
| Double-Loop Lacing | 3 | Awl, lace | High | Cases, durable for tools in garages. |
| Cross-Stitch | 3 | Needles, thread | Medium | Keychains, gifts that stand out. |
| Baseball Stitch | 4 | Awl, two needles | High | Gloves, curved seams for comfort. |
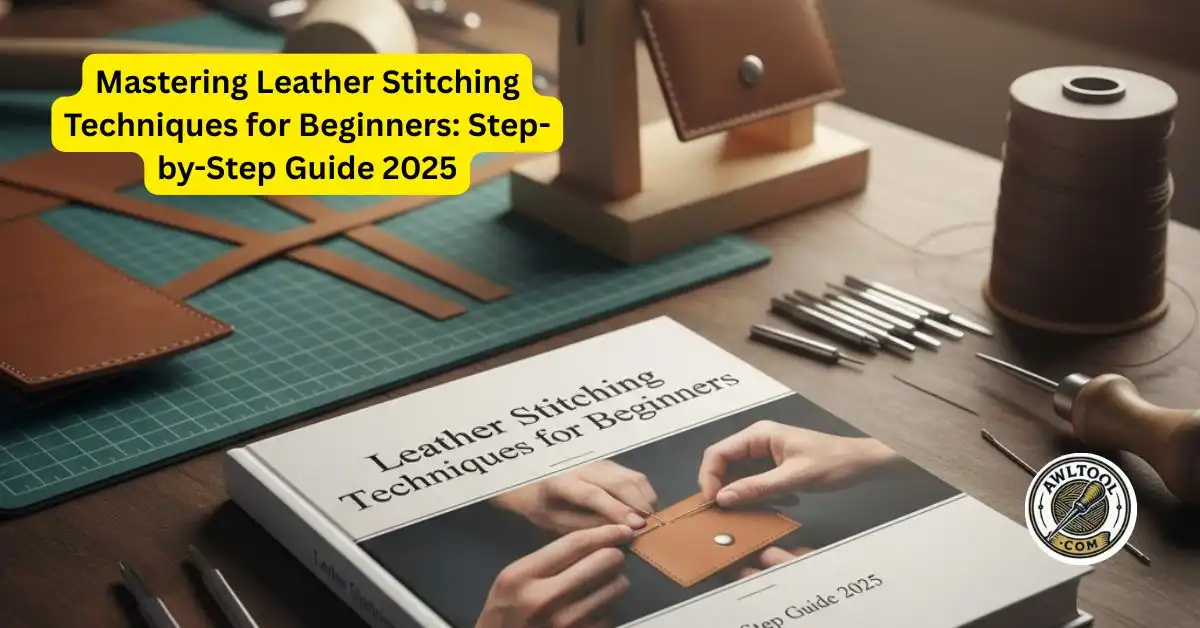
Step-by-Step: How to Saddle Stitch Leather (Core Beginner Technique)
Saddle stitching is central to beginner success, it’s reliable for USA projects like repairing cowboy boots or making minimalist wallets.
Prepare Your Leather Like a Pro
- Mark: Groove a straight line with ruler, use a wing divider for precision.
- Punch: Chisel on mat, tap gently; for plastic alternatives, see my 5 Best Plastic Awl Tools Review.
- Secure: Pony clamp to free hands, mimicking pro setups.
Threading Needles for Smooth Stitching
Cut 4x length, wax thoroughly, tips from my crafting trials prevent snaps. Attach blunt needles; equal sides for balance.
Detailed Stitching Process
- First hole: One needle through, center thread.
- Opposing: Second from back, cross inside.
- Tension: Pull firm but not puckering, practice solves loose seams.
- Straight: Alternate, check every few for alignment.
Finishing Strong Seams
- Backstitch: Reverse 2-3 for lock.
- Cut: Short tails, trim.
- Seal: Lighter melt, safe in ventilated USA garages.
How to Sew Leather Without a Machine: Beginner-Friendly USA Guide
For Americans without space for machines, hand sewing with awl, needle, and thread is ideal for small repairs like patching jeans or wallet fixes. It’s portable for road trips; focus on pre-punching to ease hand strain, common in older crafters.
How to Sew Leather on a Machine: Tips for USA Home Sewers
Household machines skip on thick hides, upgrade to walking-foot models from Singer (available at Sears remnants or online). Use heavy thread; avoid tension errors causing bunches, a frequent Amazon review gripe.
Troubleshooting Common Leather Stitching Problems for USA Beginners
Uneven spacing: Re-mark with templates. Tears: Sharper tools; reference my 8 Common Awl Mistakes and How to Avoid Them – A Complete Guide.
Fraying: Extra wax.
Tension: Loosen grip, relieves wrist pain from long sessions.
Re-punch: Align carefully; for specialty tools, see Are There Awl Tools Designed for Specific Crafting Techniques? 2025.
For hole issues, my 5 Best Hole Punching Tools in the USA helps.
Printable Step-by-Step Summary for Your USA Workshop
- Mark groove.
- Punch holes.
- Thread/wax.
- Alternate stitches.
- Backstitch.
- Seal ends.
Laminate for your bench!
FAQs on Leather Stitching for Beginners
What is the easiest leather stitch for beginners?
The running stitch is the easiest, using a simple in-and-out motion with just a needle and waxed thread. It’s ideal for quick repairs like jacket patches and helps build tension control before advancing to stronger stitches.
Can you stitch leather without special tools?
Yes, use a basic awl or thick needle to punch holes and waxed thread for sewing. It’s fine for small DIY projects, but starter kits improve results and reduce frustration.
What thread is best for hand-sewn leather?
Waxed polyester or linen thread works best for durability and smooth gliding. Match thickness to leather, 0.8mm for medium hides, to create strong seams in varying USA climates.
Is saddle stitching stronger than machine stitching?
Yes, saddle stitching is stronger for leather as it interlocks threads with two needles, preventing unraveling under heavy use like on bags or boots, unlike machine stitches.
How do you sew thick leather by hand?
Pre-punch holes with an awl or chisel, then saddle stitch with heavy waxed thread and two needles, keeping even tension. Clamp the leather for stability to avoid tears and fatigue.
What tools do I need to start stitching leather?
Essentials include an awl, blunt needles, waxed thread, stitching chisel, and edge groover. Add a mallet and pony for precision, affordable at USA stores like Tandy Leather.
Conclusion
Mastering leather stitching as a beginner opens up endless DIY possibilities, from repairing everyday items like wallets and belts to crafting custom gifts that last.
Start simple with the running or saddle stitch, practice on scraps to build skills, and invest in quality tools to avoid common frustrations.
With patience, you’ll create durable, professional pieces, remember, it’s about enjoying the craft and solving real USA challenges like sustainable repairs in 2025.
Quick recap for success:
- Prep properly: Mark, punch, and clamp.
- Stitch evenly: Use waxed thread and maintain tension.
- Finish strong: Backstitch and seal.
For More: 10 Leather Stitching Techniques
Explore more on AwlTool.com for tool reviews and advanced tips. Happy stitching!
Join the Community on Instagram and Facebook: Share your favorite marking or drilling tools and tag us to get featured!
Best Awl tools Short lists by job categories:
- Best awl tool for Woodworking
- Best awl tool for leatherworking
- Best awl tool for Bookbinding
- Unique Applications (Carpet awl, Bone)

About the Author Nicholas N. Goforth: This review is based on 20+ years of hands-on testing, analysis of 100+ customer reviews, and consultation with professional bookbinders and conservators. All products were personally tested or reviewed by verified purchasers.